Wednesday, September 26, 2007

Art appreciation day

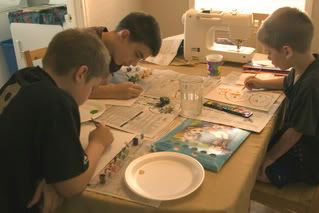
I found some paint-by-numbers sets at Walmart for two bucks and bought some for the big boys. JP and Danny got halloween watercolor books. They spent most of the day painting...IN SILENCE! It was just glorious! I was able to read and even got in an hour of sewing without someone saying, "mama" every two seconds!
It's true, art soothes the savage beast!
Photo Sharing and Video Hosting at Photobucket

Photo Sharing and Video Hosting at Photobucket

Little Danny also rode a bike for the first time today! We were all outside cheering him on as he peddaled around the driveway:
Photo Sharing and Video Hosting at Photobucket

Monday, September 24, 2007

Summer revisited

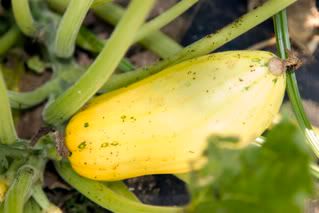
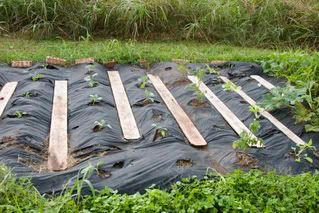
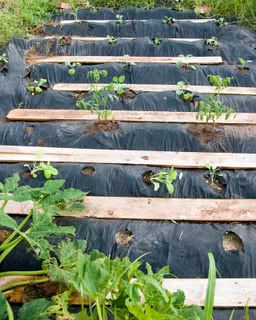
Ha! Who says you can't grow summer squash and tomatoes in late September here in Texas?
Photo Sharing and Video Hosting at Photobucket

Photo Sharing and Video Hosting at Photobucket

Saturday, September 22, 2007

Front porch makeover!

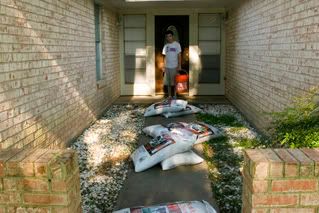
Ever since we moved in I have wanted to get the front porch area cleaned up, well we finally did it! Ryan had a particularly bad week in the behavior department and so his punishment was to remove all the rocks in the beds. I tell you, we have tried every punishment under the sun with that child, but nothing has worked better than this day of hard, physical labor! He really had time to think and reflect over the past week, plus, I think he's very proud of the job he did today....I know I am!!!
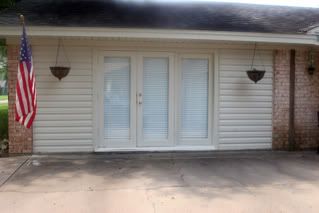
Here's the before picture:
Photo Sharing and Video Hosting at Photobucket

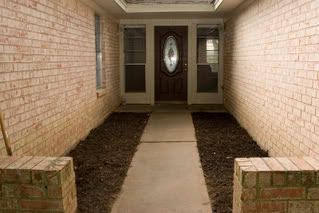
The beds with rocks removed, landscaping fabric laid down, and a layer of mulch:
Photo Sharing and Video Hosting at Photobucket

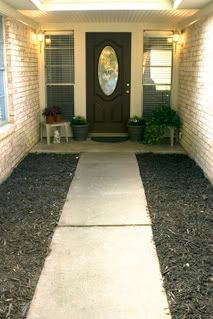
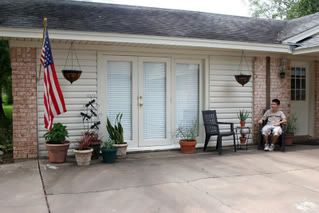
The finished project:
Photo Sharing and Video Hosting at Photobucket

Now just to figure out what to plant in the beds that will make it through the winter!

Thursday, September 13, 2007

Fall planting

I planted my fall garden today! A local nursery had some fall veggies for sale, so I didn't have to start from seed this season. We planted mustard greens, two varieties of cabbage, brussel sprouts and broccoli. Last week, I happened to find three tomato plants on the clearance shelf in the garden center at Walmart, so I added them to the garden, too.
Can't wait for the cooler weather to kick in and serve a dinner of roasted fall vegetables!
Photo Sharing and Video Hosting at Photobucket

Photo Sharing and Video Hosting at Photobucket

Wednesday, September 12, 2007

My new hobby!

Well I've finally found something that my oldest and I have in common...we like digging through other people's crap!
Ryan and I have been hitting the garage sales here in town on my weekends off, and we've been having a great time! We get up early and hit the sales, take a break for a smoothie and coffee, and we're off again! We've had lots of good talks along the way, too!
We found all of this last weekend for only 19 bucks:

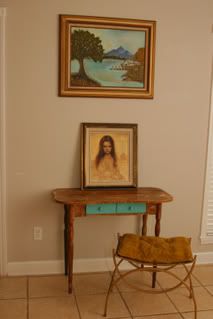
Here is a great little table I found. I plan on repainting it and putting it in the foyer. The little setee is for my vanity. I initially bought the two pictures for the frames, but it turns out that I really like the scenic picture in the one on the wall, so I'm keeping it as is. As for the other one, I'm going to prime over the print and let Kyle paint something else over it. I'll post it when he's finished!
Photo Sharing and Video Hosting at Photobucket

I found these two little porceline Mary statues and a very ornate gravy boat. I decided to turn the gravy boat into a planter and put them all on my kitchen windowsill. I just love my little "kitchen Madonnas!"
Photo Sharing and Video Hosting at Photobucket

Photo Sharing and Video Hosting at Photobucket

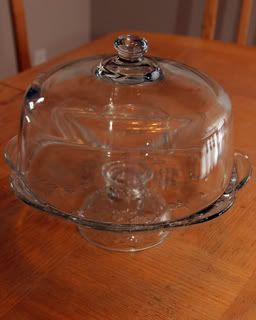
A BEAUTIFUL cake platter...
Photo Sharing and Video Hosting at Photobucket

An incomplete set of china:
Photo Sharing and Video Hosting at Photobucket

A few chochkies for my bedroom shelves, a mirrored tray, and some more state plates for my kitchen walls:
Photo Sharing and Video Hosting at Photobucket

It's true....
one man's trash is another man's treasure!

Monday, September 10, 2007

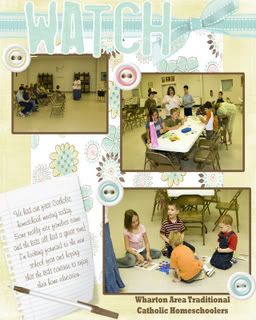
Our new homeschooling group!

When we lived in Houston, we were part of a very large and very active Catholic homeschooling group. Since moving away, we've really missed interaction with other h.s. families (me more so, than the kids!) I decided to go ahead and start up my own group here in town and put the word out to surrounding communities.
We had our first meeting on Sept. 7th! Four families showed up, and an additional two contacted me but were unable to come due to schedule conflicts. Now six families may not seem like a lot, but considering each family has 4+ kids, you're talking about a pretty good turn out!
The kids (and moms) had a great time and it was so good to be with other like minded families and share our philosophies on child rearing and the Faith!
The name of our group is Wharton Area Traditional Catholic Homeschoolers, or W.A.T.C.H for short.
Photo Sharing and Video Hosting at Photobucket

Wednesday, August 29, 2007

Our boys

I had Doug take some pictures of the boys since we are starting the new school year. Honestly, have you ever seen more handsome young men?

Reason #4,564,687 I homeschool

This young lady is a product of the public education system.

Monday, August 20, 2007

Stuffed bread

I know, all you need is another bread recipe!
This is one of my favorites. So easy to bake then wrap up for a trip to the park or beach! The variations are endless, I'll list some of our faves at the end of the tutorial.

Stuffed Bread

1 package OR 2 1/2 tsp. active dry yeast (You can also use "instant" yeast so you don't have to wait for activation.)
1 cup warm water
3 cups all-purpose flour
1 egg
1 tablespoon butter
1 tablespoon white sugar
1 teaspoon salt

In a small mixing bowl, dissolve yeast and sugar in warm water. Let stand until creamy, about 10 minutes. If you use instant yeast, omit this step!
In a large mixing bowl, combine the yeast mixture with the flour, egg, butter, and salt; mix well. When the dough has pulled together, turn it out onto a lightly floured surface, and knead until smooth, about 8 minutes.
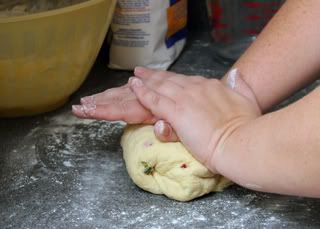
Photo Sharing and Video Hosting at Photobucket

Lightly oil a large mixing bowl, place the dough in the bowl, and turn to coat with oil. Cover with a damp cloth and let rise in a warm place until doubled in volume, about 1 hour. (If you have an electric oven, place bowl in oven with the light on. It's the perfect warm environment!)
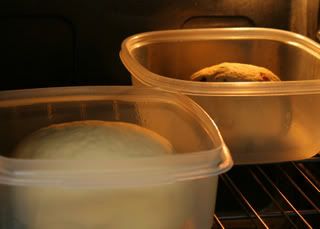
Photo Sharing and Video Hosting at Photobucket

Deflate the dough, and turn it out onto a lightly floured surface (I use parchment paper because it makes transferring this thing to the baking sheet MUCH easier!) Roll or pat the dough into a 10x14 inch rectangle.
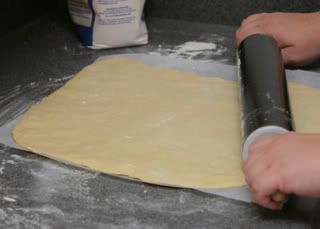
Photo Sharing and Video Hosting at Photobucket

Make parallel cuts 1 inch wide and 2 inches long on the two long edges of the rectangle.
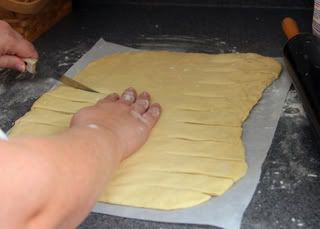
Photo Sharing and Video Hosting at Photobucket

Evenly spread the filling mixture over the center of the rectangle.
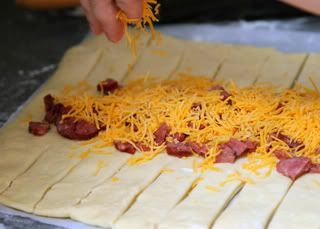
Photo Sharing and Video Hosting at Photobucket

Fold the end up over the filling and secure by cris-crossing the first two strips over the folded end.
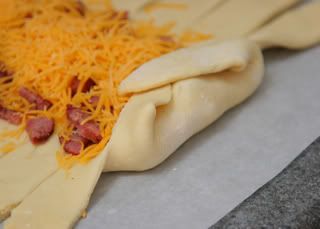
Photo Sharing and Video Hosting at Photobucket

Starting from one of these ends, alternately stretch strips from the two sides across the filling so that the strips overlap diagonally.
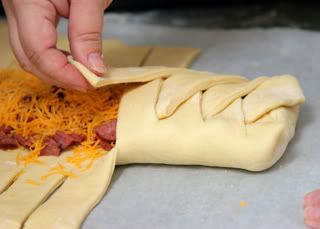
Photo Sharing and Video Hosting at Photobucket

Place bread in a warm area of your kitchen and allow to rise about 45 minutes. Meanwhile, preheat your oven to 400 degrees.
Bake at 400 degrees for 20 to 30 minutes, or until golden brown.
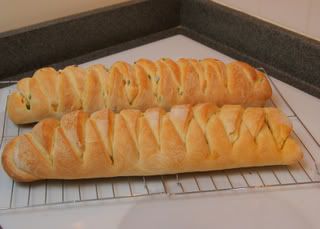
Photo Sharing and Video Hosting at Photobucket

Photo Sharing and Video Hosting at Photobucket

These loaves are wonderful to take for a lunch on the go. You simply slice off what you need and wrap up the rest! No need for packaging individual sandwiches.
You can add just about anything to your dough during the mixing stage. In my photos, one loaf is plain bread, while the other one has chopped jalapenos fresh from the garden.
Other good dough mix-ins are: chopped roasted garlic, sliced kalamata olives, carmelized onion, dried herbs (never had good luck with fresh except rosemary!), peppers of all kinds, LOTS of fresh ground black pepper.
Fillings are endless, too! We mainly use leftovers to fill our breads. The boys love pepperoni and provalone cheese. Doug loves artichoke tapanade with roasted chicken and mozzarella.
You can even make a sweet version for a desert! Just add a tablespoon more of sugar and a little cinnamon to the dough recipe then fill with your favorite pie filling. Dust with powdered sugar when cooled.
Enjoy!

Thursday, August 16, 2007

...been watching a little too much HGTV!

We finally got the sidding installed on the house and it makes such a HUGE difference, the place is really shaping up! Our patio area was looking a little bare so I spruced it up with some plants and a table and chairs that I found on sale earlier in the year.

Our patio area before:
Photo Sharing and Video Hosting at Photobucket

And after:
Photo Sharing and Video Hosting at Photobucket

Now we can sit outside comfortably and watch the boys play ball and ride their bikes...well, comfortably besides the heat and mosquitos!

Sunday, August 12, 2007

Thank you, Lord, for...

Thank you, Lord, for...

...air conditioning.

...refrigerators (take nothing for granted!)

...cold lemonade in ice-filled glasses.

...air conditioning.

...summer time clothes that don't take up much room in the washing machine (meaning I can skip a day or two and it won't overwhelm me!)

...pool memberships.

...summer-time agendas that permit propping up one's feet and drinking cold drinks.

...the beach.

...and, did I mention...air conditioning?

Friday, July 20, 2007

I'm a dumpster diver!

Never thought I would hear myself utter those words!
The other day, on my way to work, I passed a house that was having a garage sale. I saw they had tons of furniture and stuff...but just kept on driving. When I was coming home that evening, they had everything they didn't sell by the side of the road for trash pickup.
This is what I scored:
Photo Sharing and Video Hosting at Photobucket

Photo Sharing and Video Hosting at Photobucket

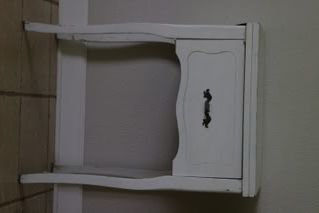
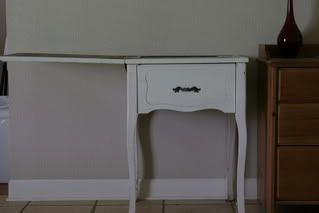
It's an old sewing cabinet! It's still in really good condition, just needs a sanding and new coat of paint! I'm thinking I will do an antique "crackle" finish on it and put it in the foyer.

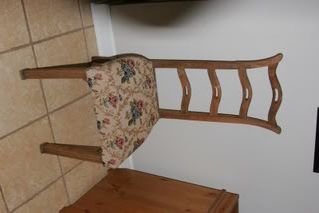
I also scored a chair! Here it is after I re-covered the seat cushion:
Photo Sharing and Video Hosting at Photobucket

I have to say that "dumpster diving" is potentially addicting!
Of course, the kids are mortified that their mother is doing this!

Friday, July 13, 2007

Watermelon!

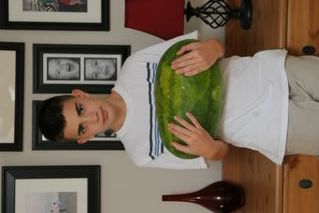
Well today we sacrificed our first "baby" out of the melon patch....and boy was he tasty! With the recent deluge our melons have fattened up and we had to pick them or lose them (they bust wide open if they get too much water!) Here's Ryan with our first pick:
Photo Sharing and Video Hosting at Photobucket

Enjoying ice cold watermelon on the back porch:
Photo Sharing and Video Hosting at Photobucket

Photo Sharing and Video Hosting at Photobucket

...and spitting the seeds in the grass!
Photo Sharing and Video Hosting at Photobucket

Saturday, July 7, 2007

Ciabatta Style Rustic Pizza!

This is an awesome pizza dough that gives you a very rustic style pizza! Just had to share!
A kitchen aid style stand mixer is required, unless you're comfortable working with high hydration doughs and hand mixing. People have assured me it's possible, but it's much easier with a mixer. You could also use a food processor to mix the dough, but the time will be much shorter. Probably less than a minute.
The resulting pizza is light, delicious, and full of huge holes in the crust. If you grow tomatoes and basil in your garden, this pizza is just the ticket.

Ingredients:
2 1/2 C. Bread Flour (All Purpose will also work in a pinch)
1 cup water
1 tsp yeast
1 tsp. salt
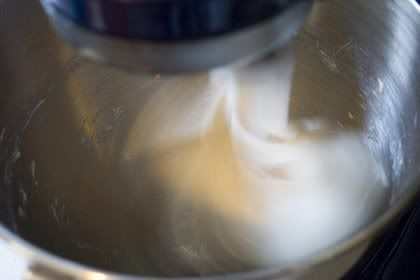
Mix the flour,yeast,salt & water in your stand mixer with the paddle on high speed, it won't look like it is doing anything for a while. Then after about 10 minutes or so it will start to come together
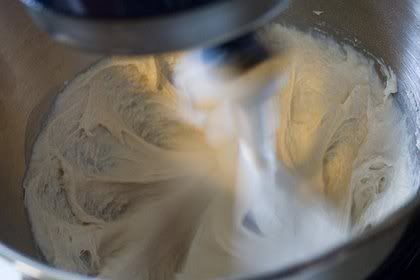
Initial mixing, notice the dough is sticking to the sides:
Photo Sharing and Video Hosting at Photobucket
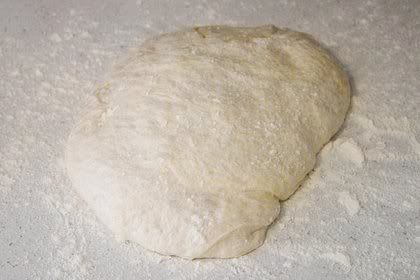
Dough is done as soon as it stop sticking to the sides and is just coming off the bottom. It has the consistency of rubber but is very sticky:
Photo Sharing and Video Hosting at Photobucket
Put the dough into a well oiled bowl and allow to proof (rise) until it triples. It MUST TRIPLE! I find the easiest and fastest way is to put the bowl into my electric oven with the light on. This step takes about 2hrs. for me. Be quick moving the dough from the mixer to the proofing container. You'll probobly still end up with a little dough stuck to your hands, because it's very wet.

Place your pizza stone into the oven and preheat to 500 degrees. If you don't have a baking stone, you can use a baking sheet placed upside down in the oven. Walmart has stones that are inexpensive, I've been using the same one from them for over five years now! Another good baking stone (and VERY cheap!) is to go to Home Depot and get an unglazed terracotta tile that is the size of your oven!
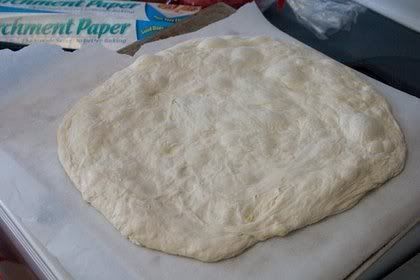
Now, on a heavily floured piece of parchment paper, pour out your dough into a nice blob. Parchment paper is silicone treated and won't melt or light on fire in your hot oven. It will make getting this thing in the oven much easier.
Photo Sharing and Video Hosting at Photobucket
Now begin to shape your pizza! Shape it while on the parchment paper by using your fingers and "walking" them out from the center of the dough or you can grab it from underneath and stretch it. Since the dough is floured on the bottom, it won't stick too much. You don't want it paper thin, but fairly thin in the center.
Photo Sharing and Video Hosting at Photobucket
Now it's time to top the pizza, I really just want some light olive oil, garlic powder, fresh tomatoes, basil and cheese. You can really do whatever you want from this point. One thing I've noticed with my oven though is that if I put the cheese on from the start, it'll burn and I'll have a raw pizza with burnt cheese. So I usually add cheese 2/3 of the way through baking.
Photo Sharing and Video Hosting at Photobucket

Once your oven has hit 500 degrees, slide your cheese-less pizza on to the pizza stone. After 5 minutes my pizza looked like this, nice oven spring! Once the crust has just started to brown (after about 8 minutes for me). I add the cheese.
Photo Sharing and Video Hosting at Photobucket

Now I just let the cheese get to the point that I like and the crust to be nice and brown and I'm done. The all together baking time for this pie was 14 minutes.
Photo Sharing and Video Hosting at Photobucket

Once again, nice airy crust, not dense and sticky, but light and delightful.
Enjoy!
Thursday, July 5, 2007

Happy 4th of July!

We had a really fun fourth, and hope you did, too! At first, we thought the day would be a wash-out. There was rain forcasted for every day this week. It had rained all day and the kids were pretty bummed. Finally, around sunset, the clouds stopped pouring and we went out and bought waaaay too many fireworks! I thought little Danny would be scared of all the noise, but he was right in the thick of things with his brothers. He especially loved the sparklers!
Here are my scrapbook pages of the day:
Photo Sharing and Video Hosting at Photobucket

Photo Sharing and Video Hosting at Photobucket